

Create a workspace
You need Workspace administration and workspace administration enabled on the instance. See Managing workspaces for permissions and lifecycle.
- Open Settings › Workspaces. Search for the intended dataset before creating another. Choose New workspace.
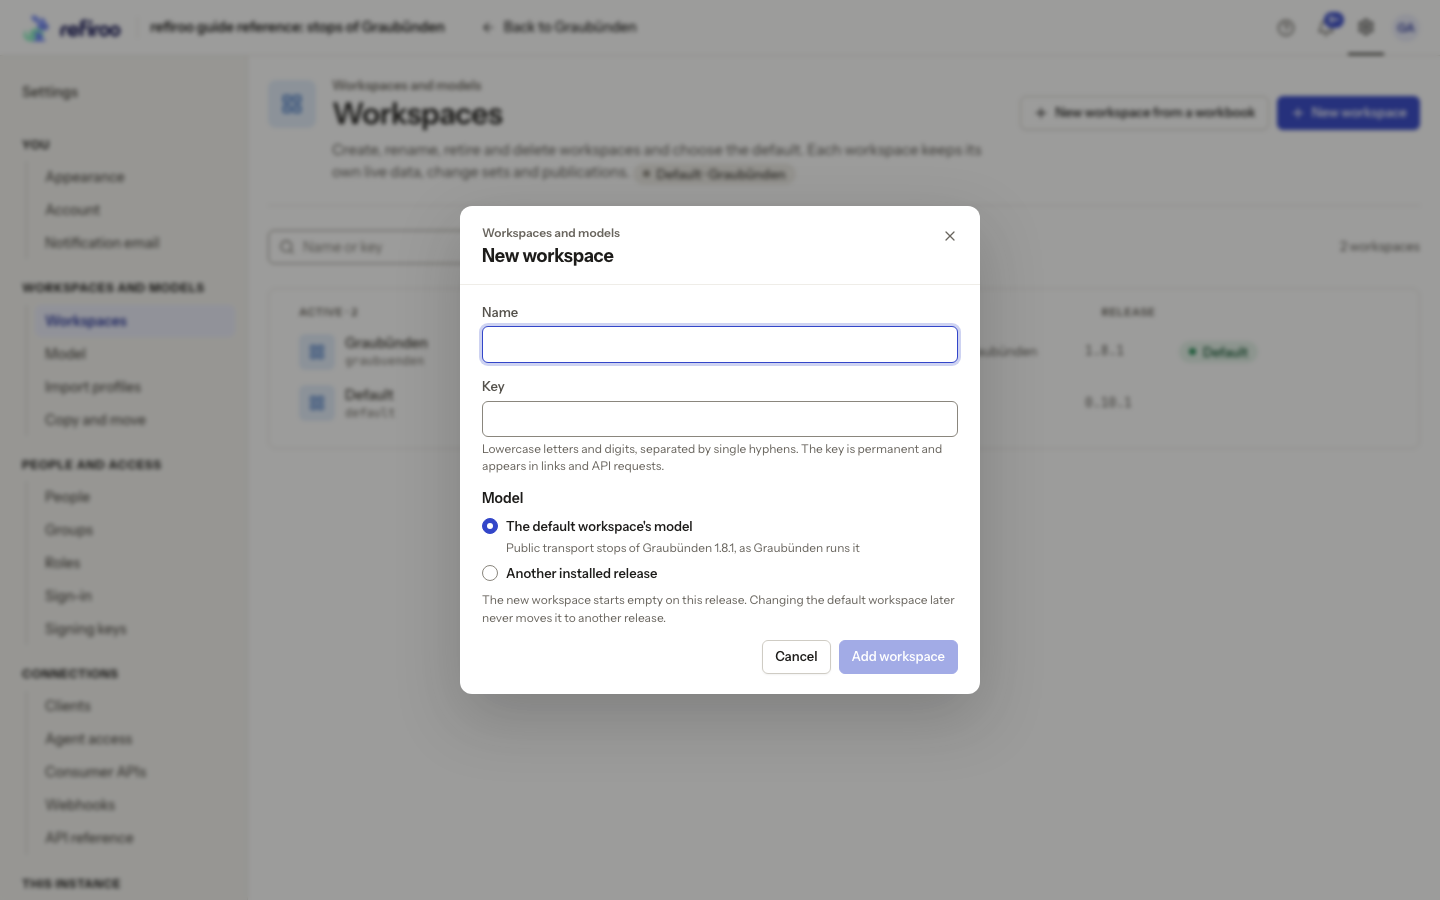
- Enter Name and review Key. The suggested key follows the name until you edit it. Use lowercase letters and digits separated by single hyphens. The key is permanent and identifies this workspace in links; renaming later does not change it.
- Under Model, choose The default workspace’s model or Another installed release. For the latter choose Installed release and check the model name and version. The picker initially shows each model’s newest usable release; reveal older versions if needed.
- Choose Add workspace. The new workspace starts empty. It copies the selected definitions, not the default workspace’s records, change sets or publications. Changing the default workspace later does not change this workspace’s selected release.
- Check its Overview, model and applications. Use Open workspace to browse its data. Arrange data access separately; workspace creation does not grant every person access. To start an empty hierarchy, open its tree view and choose Add … for its top-level type. Create that record first, then add children beneath it; see Arrange records in a tree.
The workspace was not created explains a refusal, such as a duplicate key or unusable release. Correct that cause before retrying. Cancel leaves the list unchanged.