

Create a client
Use a client for a system that works without a person signing in. You need Security administration. Agree with the integration owner what operations and workspaces it needs first. See Clients for other systems for the access and secret rules.
Create and save the credentials
Section titled “Create and save the credentials”- Open Settings › Connections › Clients. Search by Name to check whether the system already has a client. Check Deactivated as well before creating a duplicate.
- Choose New client. Enter Name, a name people can recognise in access lists and history. Choose Add client. Cancel creates nothing.
- In Copy the client’s secret, copy Client secret and Client ID into the integration’s agreed secure store. The full secret is shown once; after closing, only its last four characters identify it. Choose I have copied it after saving both.
- If creation is refused, read the message and correct the problem. If the client exists but its one-time secret was lost, rotate its secret instead of creating it again.
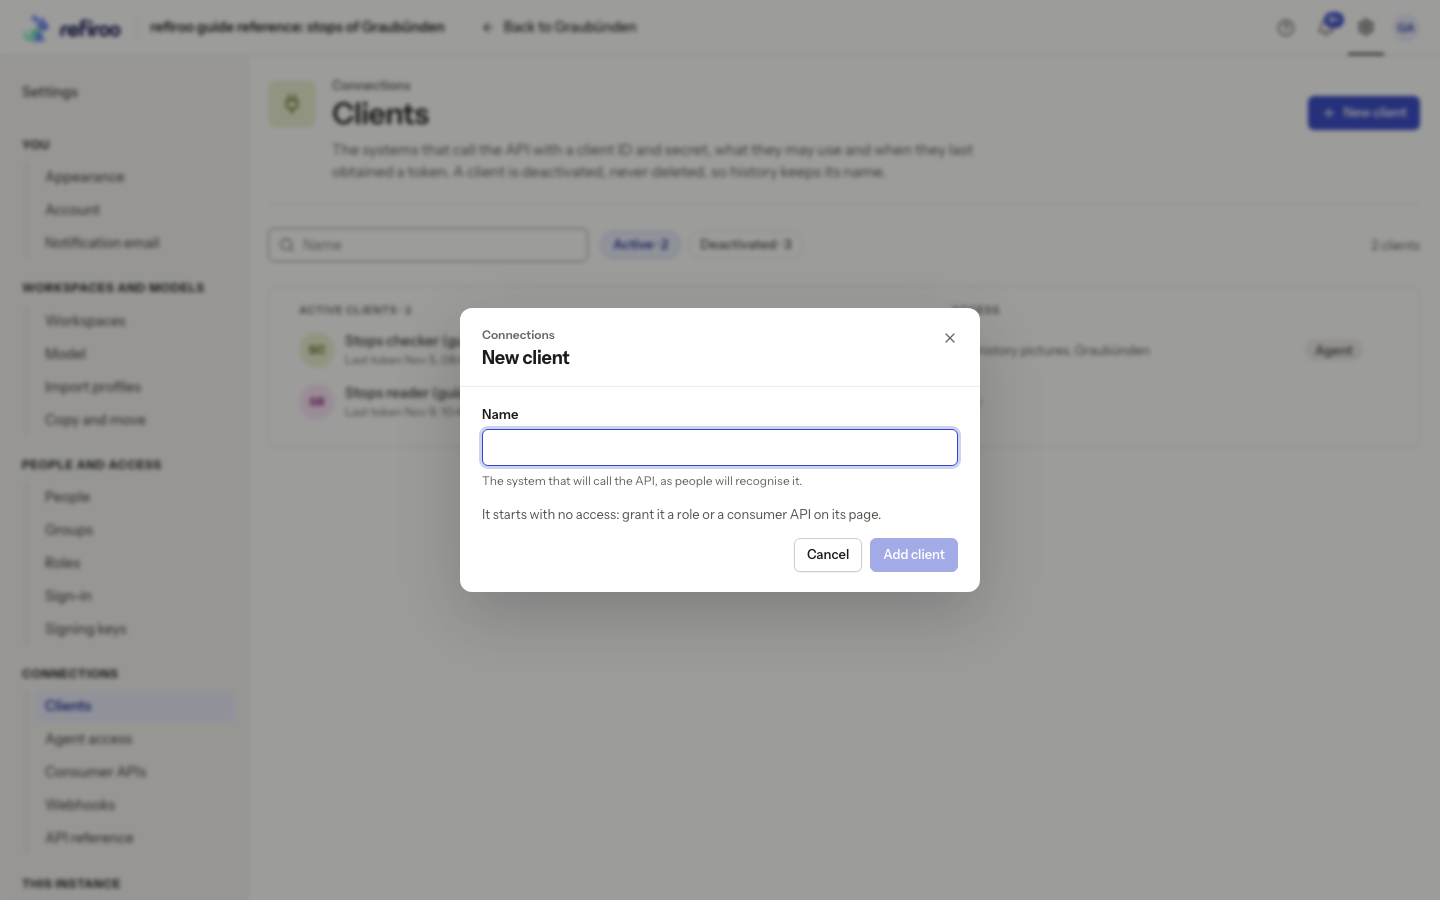
Above: the reference instance’s New client dialog is open but has not created another client.
Grant access
Section titled “Grant access”- On the new client’s page, choose Grant in Access. A new client has no access.
- Choose Roles under What for management operations. Select the least role or roles that cover the agreed work and choose where they apply. Narrow writes if appropriate, as described in Grant a role.
- For reading declared consumer APIs, choose Consumer APIs under What. Tick the grid cell for each API and workspace it needs, then choose Add grant, or Add N grants when several are selected. Row and column headings tick the whole line; a ticked grey cell is already granted. A management role does not substitute for these consumer grants.
- Check Access on the client page. Confirm the workspace, grant and any write restriction before handing the details to the integration owner.
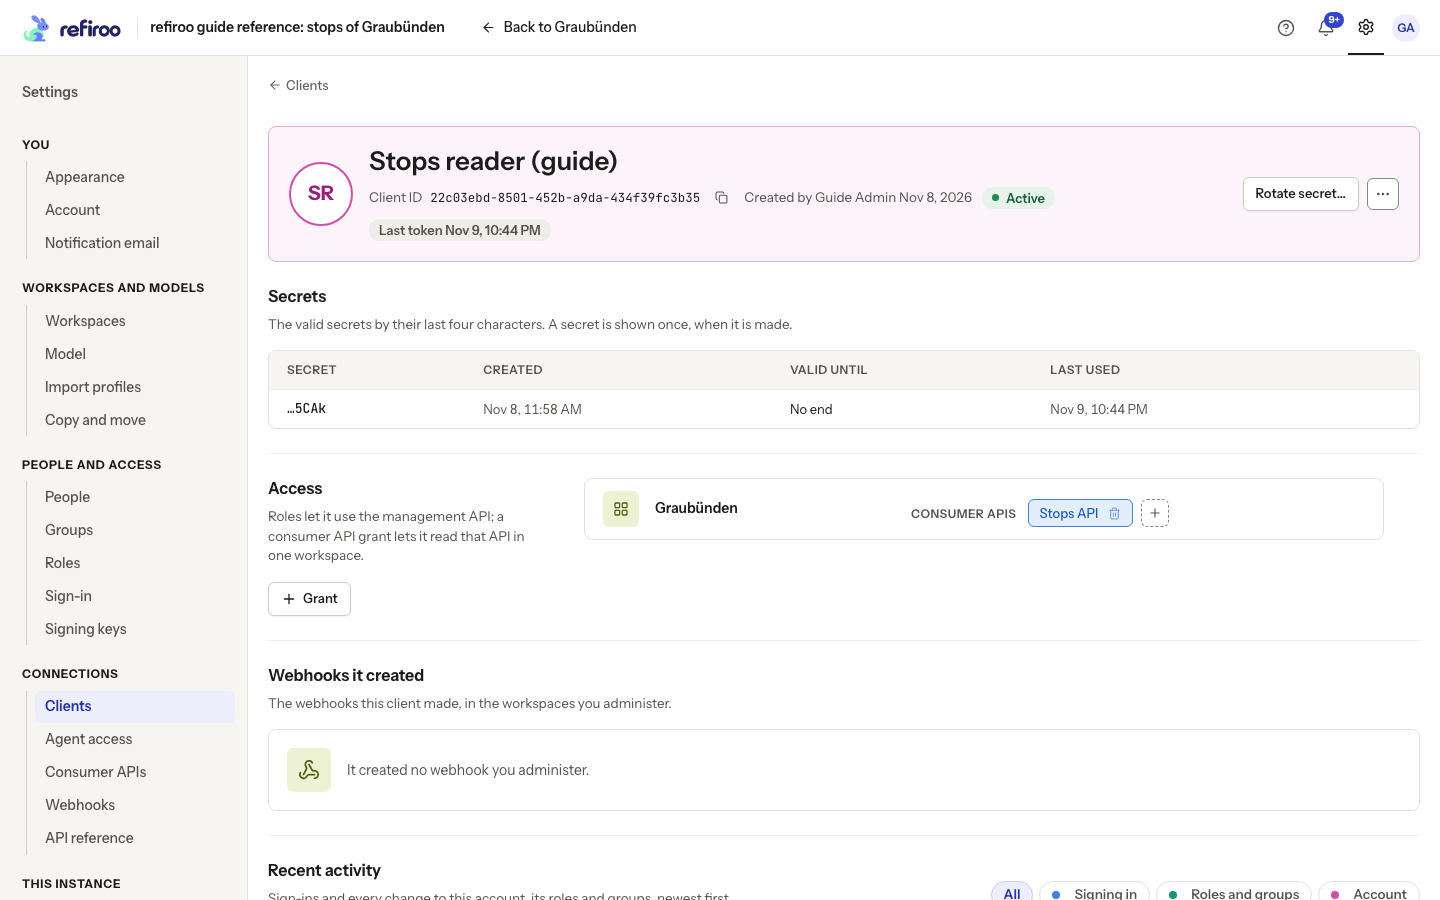
Above: Stops reader (guide) can read Stops API in Graubünden. Webhooks it created says it created no webhook you administer.
Prove the handover
Section titled “Prove the handover”Ask the integration owner to sign the system in using the ID and secret, then exercise the intended read or write. Send them the integration authentication reference for the technical sequence. Check the client’s last-authentication status and its secret’s Last used time afterwards.
A sign-in failure calls for checking the saved ID, secret, expiry and active state. If sign-in succeeds but an operation is refused, check the role or consumer grant, the workspace and any write restriction. Expanding access to the whole instance is not needed merely to correct a missing workspace grant.