

Create a webhook
Use this task when another system needs to receive changes as they happen. You need Integration administration in the source workspace and a receiver prepared by its integration owner. Read The Webhooks page for delivery rules and limits.
When Webhooks are off in this deployment appears, the page offers Open Deployment instead of New webhook. Ask the operator to enable delivery before starting these steps.
Choose what is sent
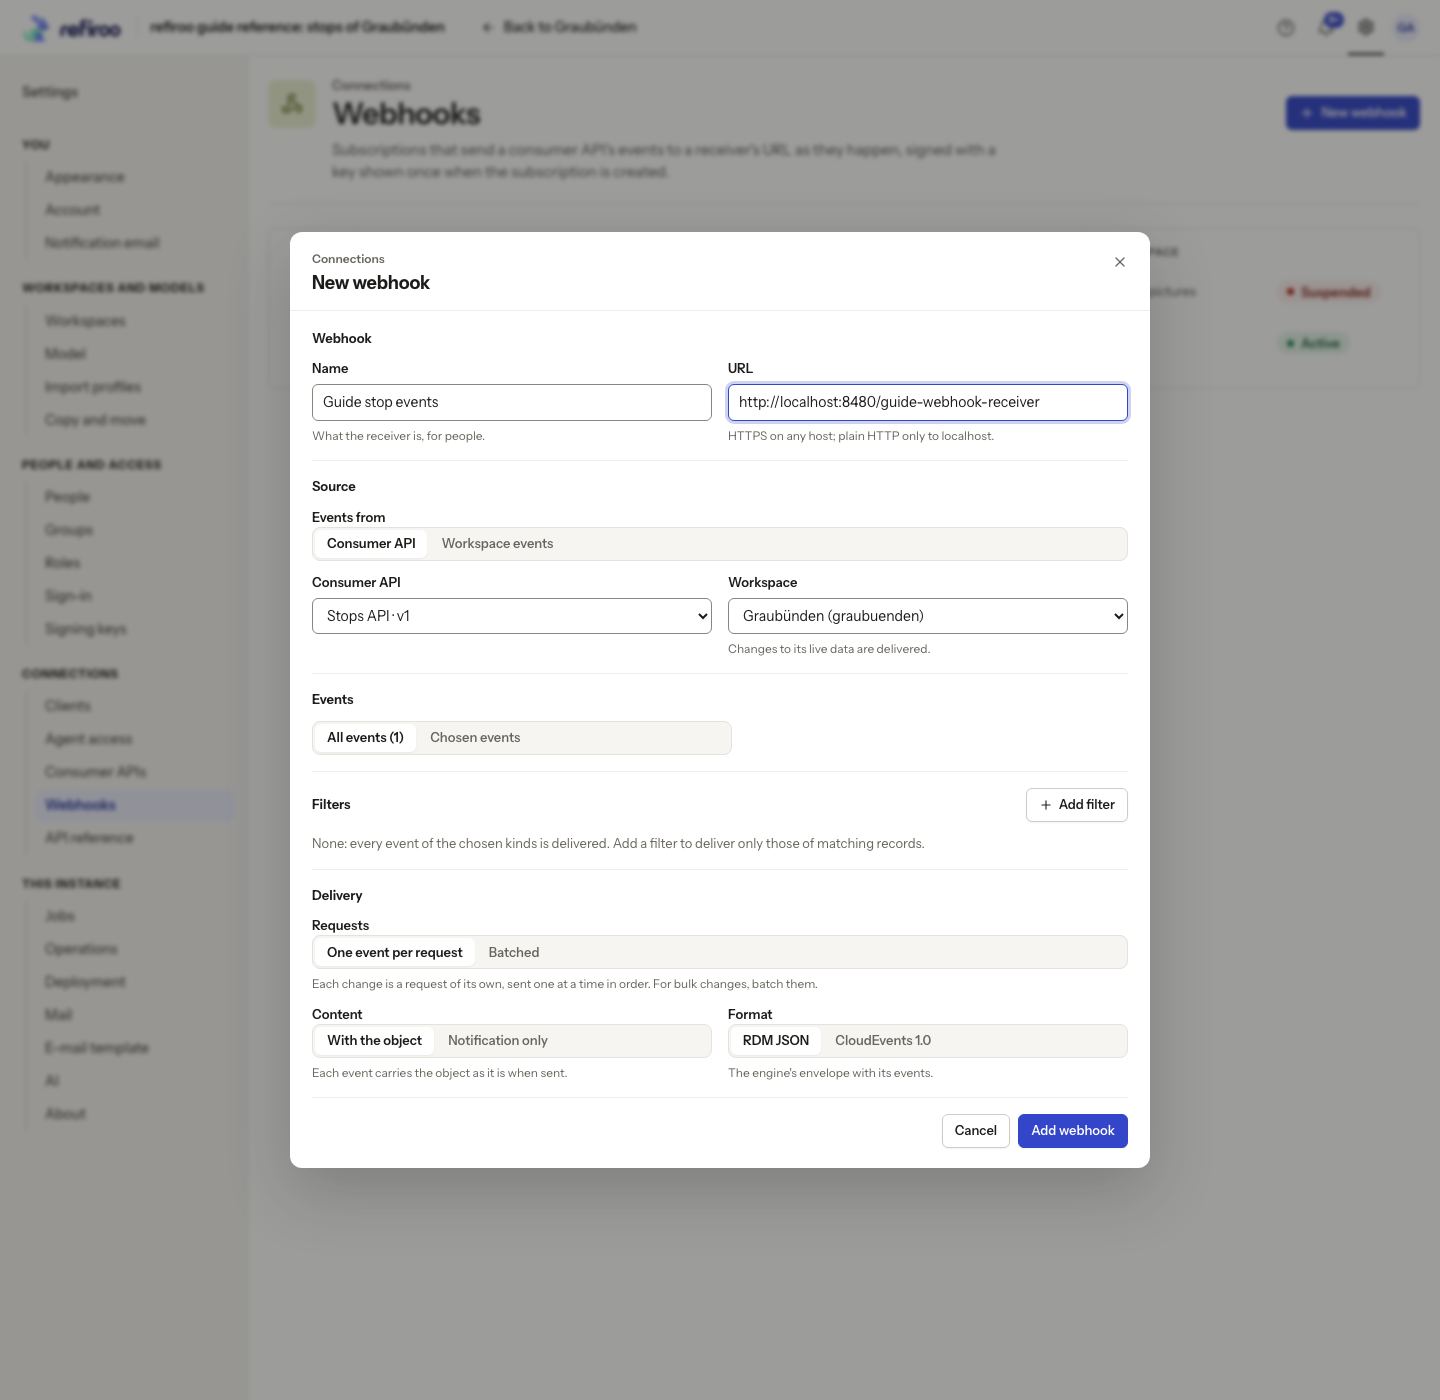
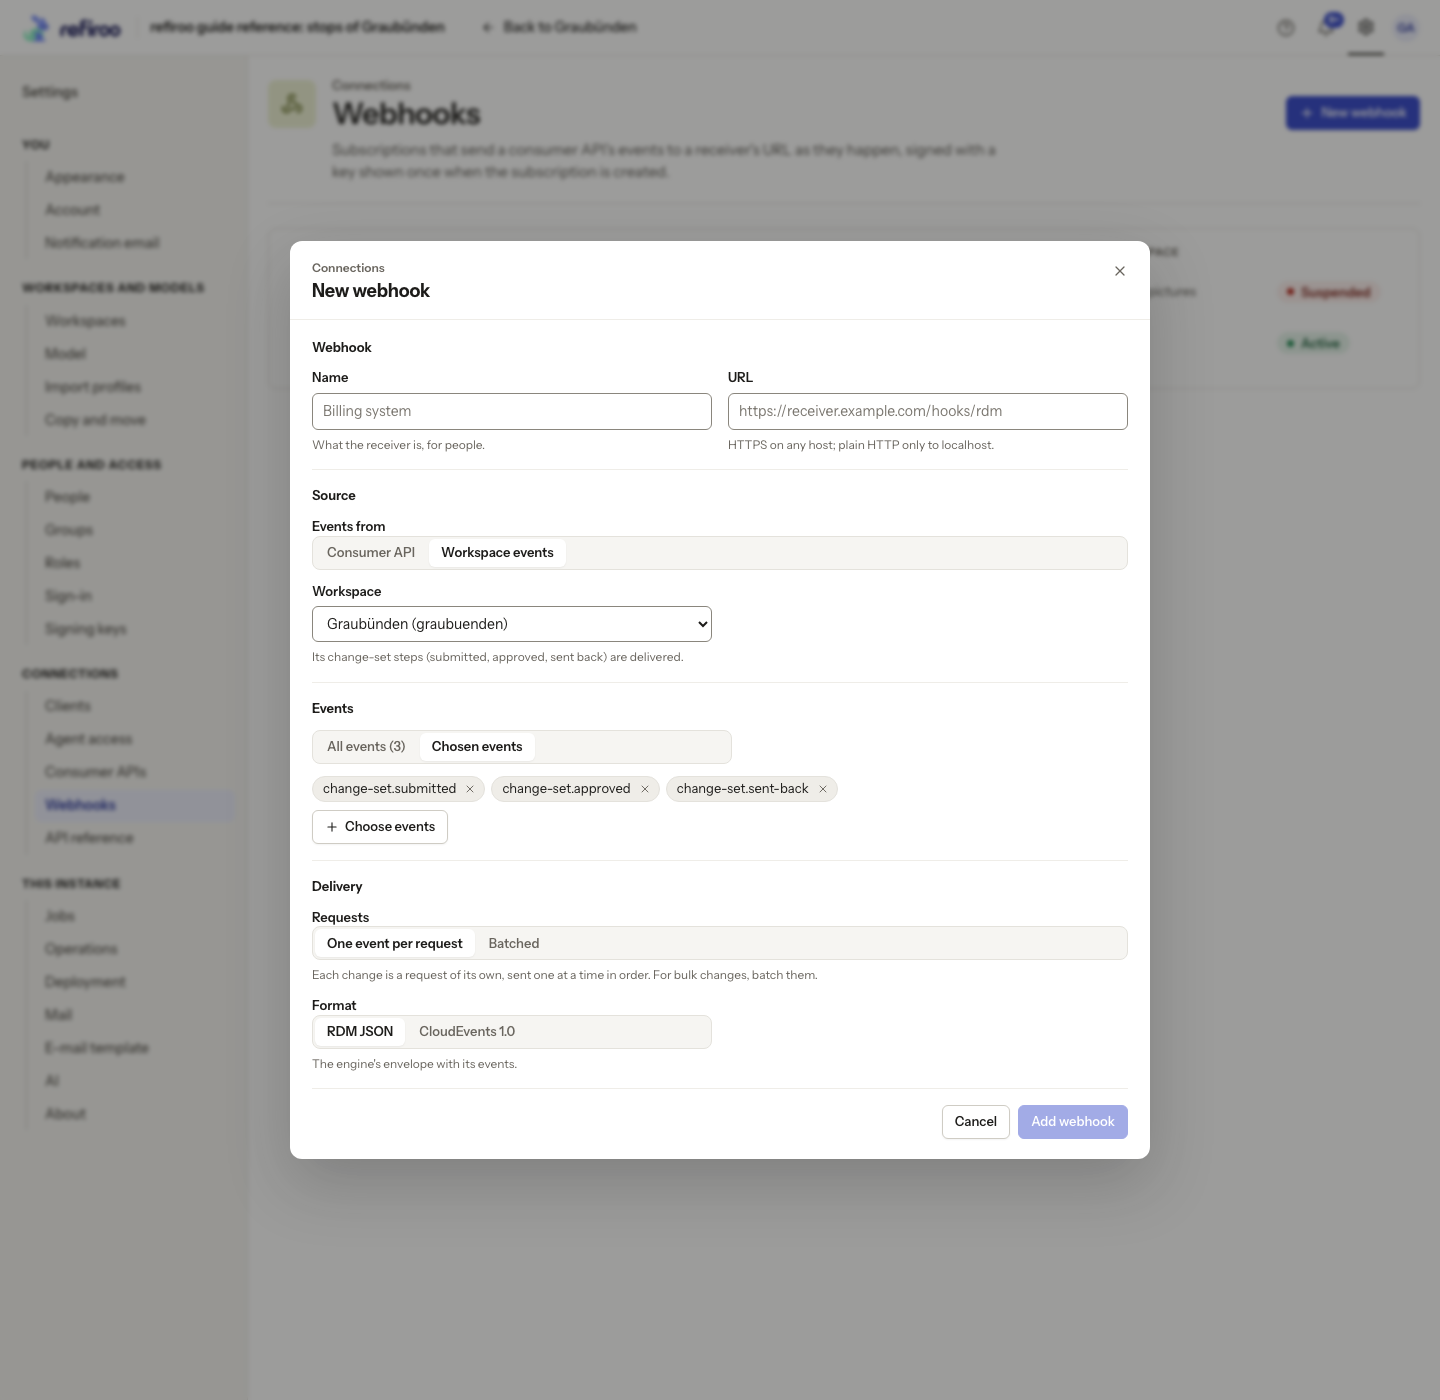
Section titled “Choose what is sent”- Open Settings › Connections › Webhooks and choose New webhook. If webhooks are off, ask the operator to enable them. Workspace events need no consumer API declaration.
- In Webhook, enter a readable Name and the receiver’s URL. Use its final HTTPS address; redirects are not followed. Private and localhost receivers need the operator to allow private destinations on this instance. Plain HTTP is accepted only for a localhost receiver when the operator has allowed private destinations. Link-local destinations are always refused. If the address is refused, ask the operator to review it before trying again.
- In Source › Events from, choose Consumer API for declared record changes, or Workspace events for change-set steps. If no consumer API declares events, only Workspace events is offered. For a consumer source, select Consumer API too.
- Select Workspace. The list offers active workspaces where you hold Integration administration. Check the source and workspace carefully: they cannot be changed after creation.
- Under Events, keep All events, or select Chosen events, then Choose events and the required entries. At least one event is required. For workspace events the choices are change-set.submitted (submitted for approval), change-set.approved (approved and published), and change-set.sent-back (returned to its author). All events (3) selects all three.
- For a consumer source, under Filters, leave none to receive every event of the chosen kinds, or choose Add filter. Enter each value and press Enter. Several values for one filter are alternatives. If there are no declared filters, none can be added here. Workspace events have no Consumer API selector, Filters or Content choices.
Agree the delivery choices
Section titled “Agree the delivery choices”- Under Delivery › Requests, keep One event per request, or choose Batched and set Up to (events) within the displayed limit. A batch sends available events without waiting to fill up.
- For a consumer source, choose Content: With the object for the current record, or Notification only when the receiver reads details itself. Workspace events describe a change-set step instead. For either source, agree Format with the receiving system’s owner: RDM JSON or CloudEvents 1.0.
- Choose Add webhook. A refusal appears beside the relevant field or as The webhook was not created. Correct the stated problem and try again. Cancel leaves without creating it.
Store the key and check delivery
Section titled “Store the key and check delivery”- In Keep the signing key, copy the key directly into the receiver’s secure configuration or the agreed secret store. It is shown once. Choose I have stored the key only after storing it. Do not include a real key in screenshots or messages.
- Check the webhook’s Configuration, including its source, destination and state. Creation starts with future changes; it does not send a copy of existing records. Arrange initial synchronisation separately with the integration owner.
- After an intended live record change or selected change-set step, open Deliveries and choose Refresh. Open the event to read its attempts and response. Succeeded means the receiver accepted it; ask its owner to check the resulting data too.
- For Retrying or Suspended, follow Find out why a webhook paused. If the key was lost before being saved, use Rotate a webhook key; the original cannot be displayed again.